
After you sign in to a new Snomi account, you land on the Getting started hub - it takes you from an empty account to a store with products, sample AI content, a quality audit, and a ready output feed. Each step checks off when you complete the action - you do not have to guess what comes next.
This article describes exactly what you see and do in each of the 7 steps.
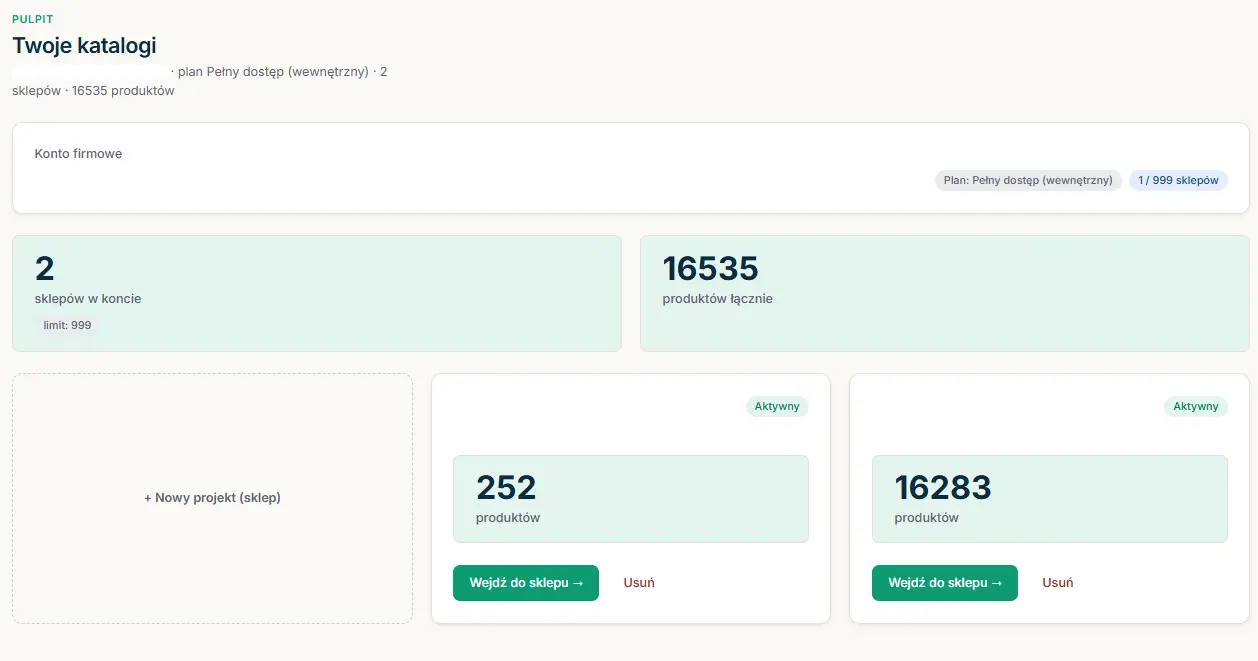
How to open the hub?
A new user with no store lands on Getting started right after sign-in - instead of an empty dashboard. If you skip the guide or come back later, you will find it in the side menu as Getting started.
At the top of the panel (also on other pages) you see a progress bar with the number of completed steps and a Continue button that returns to the hub.
What do you see on the hub?
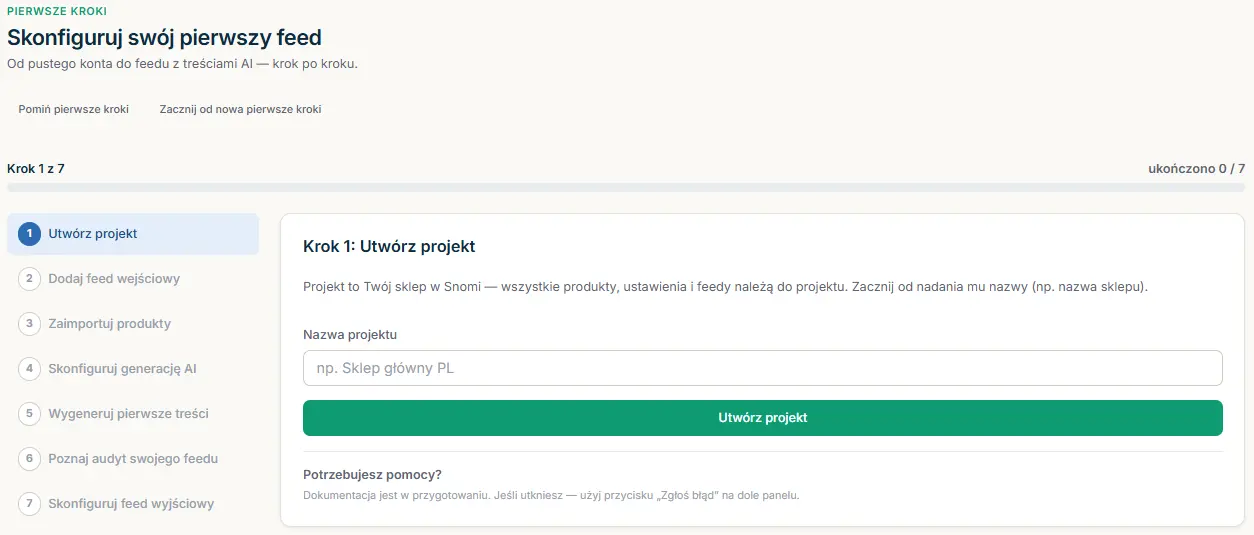
The hub has three parts: a bar with the step number ("Step X of 7"), a step list on the left (checked off in order), and instructions with buttons on the right. At the top you have two options:
- Skip getting started - turns the guide off for the whole organization. You can return later only with "Start over".
- Start getting started over - clears progress and leads you to create a new store (if the plan has a free slot).
If you have several stores, you choose at the top which store the progress applies to.
Step 1 - Create a project
You enter a store name and click Create project. A store is created in Snomi, and the step checks off.
Step 2 - Add an input feed
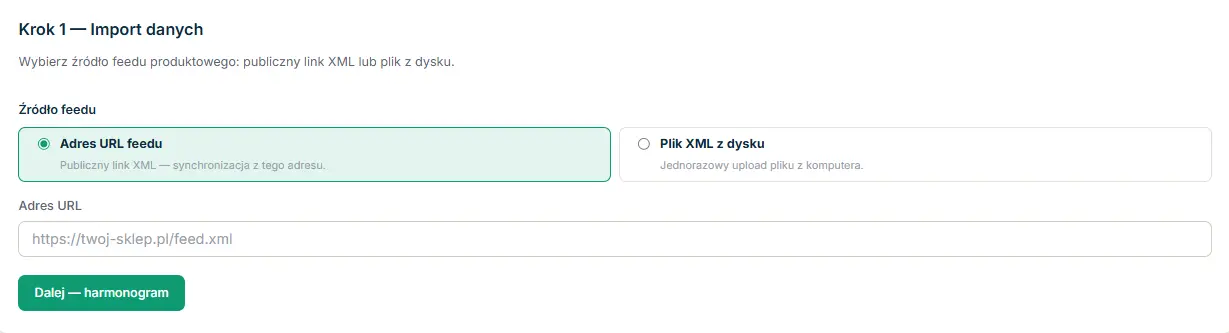
You click Add feed - you go to the Import and sync page, where you:
- Choose a source - a URL to an XML feed or a file from disk.
- Set a sync schedule - when and how it should refresh.
- Map fields - which feed values map to which attributes in Snomi.
- Confirm the mapping.
After you configure the source, you return to the hub automatically (only if you came from the guide). Step 2 checks off when the feed is connected.
If you already have a supplemental feed in Google Merchant Center with manual fixes - you can add it on the same import page. It is not required to finish onboarding, but the audit in step 6 will be more accurate because it will see the real catalog state.
Details: How to connect your store XML feed and Importing a supplemental feed.
Step 3 - Import products
Here you mostly wait. The hub shows “Importing your products…” - the status refreshes automatically.
When the import finishes and products land in the catalog, the step checks off. If something goes wrong, you see an error message and a View error details button that opens the import page.
After a successful import, Snomi starts scanning images and calculating the catalog quality audit in the background - you will need that in step 6.
Step 4 - Configure AI generation
You click Open organization - you go to the Organization tab, where you set how many AI proposals should be generated for each field. That controls how many variants of each attribute you get to choose from.
If the defaults work for you, click Continue - AI is ready and move on without changes.
Details: How AI credits work.
Step 5 - Generate first content
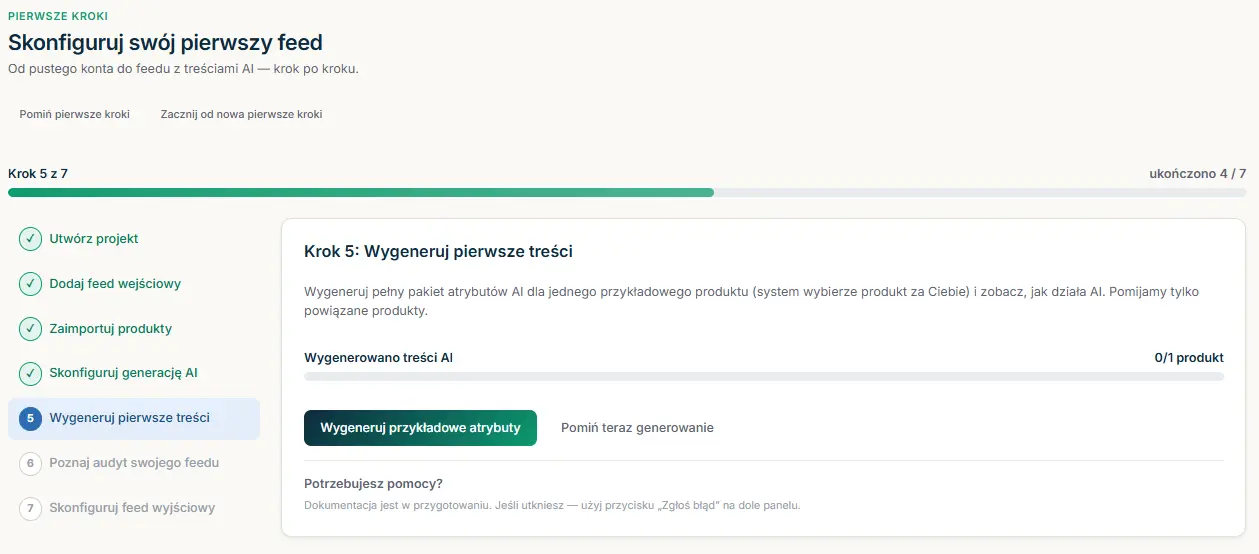
The goal of this step: see how AI works on one sample product - a full attribute pack (title, description, category, AI attributes). The system picks the product for you.
You have two paths:
- Generate sample attributes - starts generation for one product and takes you to the AI queue, where you review proposals.
- Skip generation for now - checks the step off without generating. You can generate later from the AI queue or any product card.
The step ends when generation finishes or when you click skip.
This is the first time you see what AI can do with your data. It is worth reviewing the proposals before you move on - you will see whether the style and quality fit, which helps you judge bulk optimization later.
Details: AI queue - generating, reviewing, and accepting proposals.
Step 6 - Review your feed audit
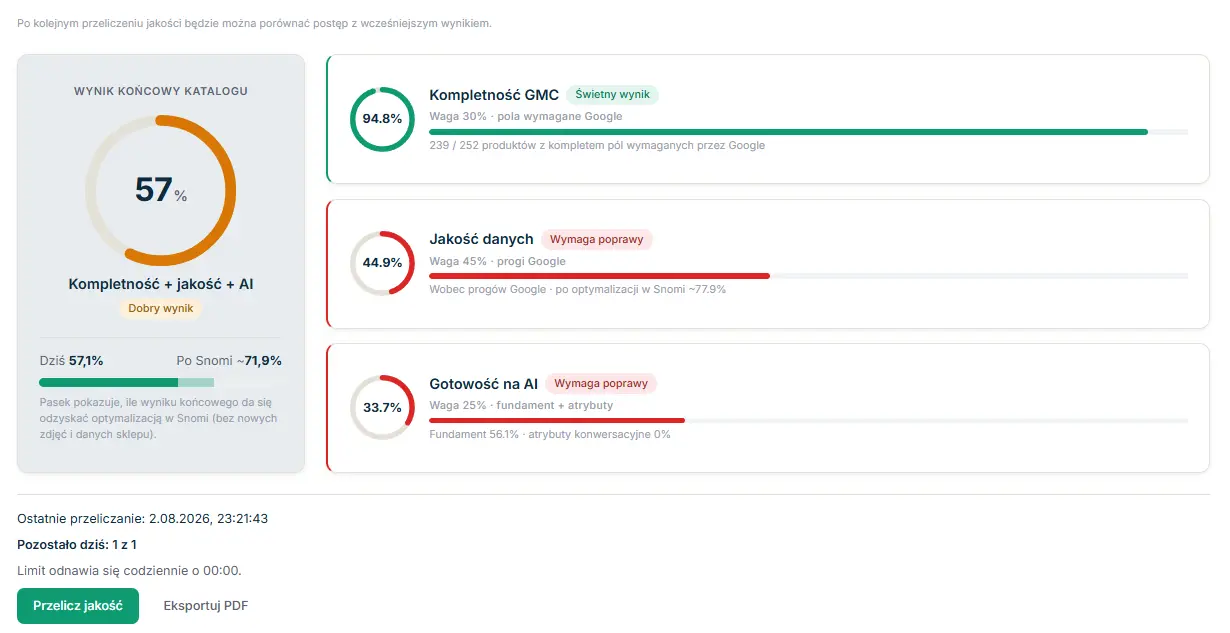
On the hub you usually already see the quality score and 2-3 biggest gaps (for example how many products lack a description). If the audit is still calculating (for a large catalog), you see a progress bar - you can move on and come back later.
You click Open catalog audit - you go to the Catalog quality tab with three rings (GMC completeness, data quality against Google thresholds, AI readiness) and a table of rules.
Opening the page checks the step off - you do not have to fix anything right away. The audit is there so you know where you stand and what makes sense to improve first.
Details: Quality dashboard - how to read the three rings.
Step 7 - Configure the output feed
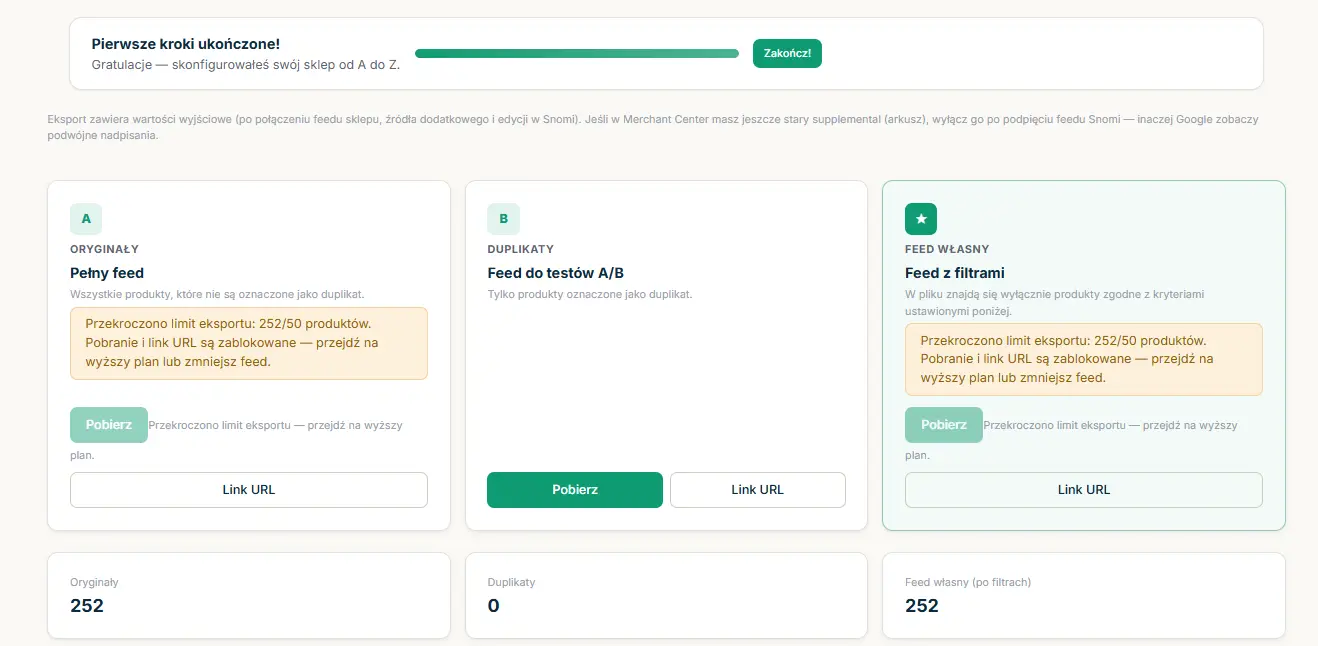
You click Open export settings - you go to the store Export page and stay there (you do not return to the hub).
At the top of the panel a bar appears: “Getting started complete!” with a Finish! button. You click it - the guide disappears, and you stay on the export page so you can copy the feed link or download XML when you are ready.
On the export page you will find a permanent URL to connect in Google Merchant Center as a supplemental feed - the most convenient option, because Google fetches a fresh feed on every sync.
Details: How to connect the Snomi feed in Google Merchant Center.
After you finish all steps
The progress bar in the panel disappears after you click Finish!. If you open Getting started later, you see “You’re ready!” with a link to products.
All work you did during onboarding (import, generation, settings) stays in place - nothing is removed. The hub is a guide, not a separate workspace.
What if I skipped the guide?
Skip getting started turns the guide off for the whole organization. Opening Getting started does not resume the step list - you only see information and a Start over button. “Start over” clears progress and leads you to create a new store (if the plan has a free slot) - it does not delete existing data.
If you skipped the guide but want to do the same work manually - Typical workflow: from import to a feed in Merchant Center describes the same path without the guide.
Viewer role (VIEWER)
A user with the Viewer role can see step progress but cannot perform actions - creating a store, AI generation, skipping, and configuration require a higher role.
Frequently asked questions
Do I have to complete all 7 steps to use Snomi?
No. You can skip the guide at any time. The steps are a suggested order, not a requirement - every feature is also available directly from the panel menu.
Can I go back to an earlier step?
Yes. The step list on the left of the hub lets you click any completed step and open it again.
What happens if I click “Start over”?
Step progress resets and the guide leads you to create a new store. Data from existing stores (products, generations, settings) stays untouched.
How long does the import in step 3 take?
It depends on catalog size. A few hundred products import in seconds; tens of thousands take a few minutes. Status refreshes automatically - you do not need to reload the page.